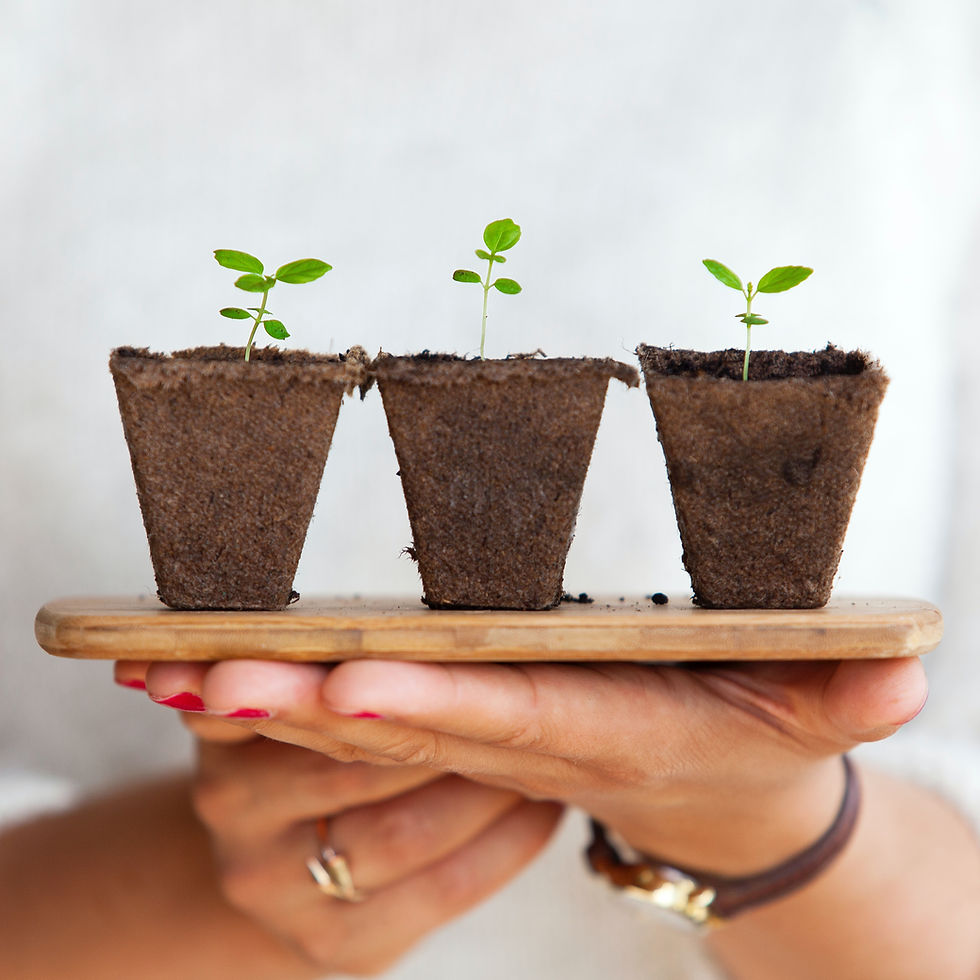
Seed Starting Indoors 101
- Hannah O'Connor

- Jan 23, 2025
- 10 min read
Updated: Aug 8, 2025
Starting seeds indoors allows gardeners to extend the growing season, experiment with unique plant varieties, and save money compared to buying transplants. With just a few weeks of freezing weather left, late January is the ideal time to begin preparing your spring seedlings. In this guide, you'll discover essential tips and techniques to successfully start your seedlings indoors.

Supplies Checklist
To begin seed starting indoors, gather these essentials:

Containers: Choose from seed trays, small pots, or even repurposed items like egg cartons.
Growing Medium: Use sterile seed-starting mix or coco coir, like our "Fox Farm Bush Doctor Coco Loco" in 12-qt bags for $17.00.
Light Source: Use fluorescent or LED grow lights or position them near a sunny window.
Labels and Tools: Use labels for organization and shovels for scooping dirt into the pots.
Watering Tools: Keep the medium moist with a spray bottle or bottom-water trays.
Pro Tip: Bottom watering prevents mold and keeps the soil evenly moist, which is crucial for seed germination.
Step-by-Step Guide to Getting the Seeds Started
Step 1: Select the Right Seeds
Choosing the right seeds is crucial. Here’s what to consider:

Match Seeds to Your Goals:
If you're growing for food, start with fast-growing and beginner-friendly vegetables like lettuce, radishes, or peas.
Zinnias, marigolds, snapdragons, and native Texas wildflowers such as bluebonnets or Indian Blankets are excellent flower choices.
Want to grow herbs? Basil, chives, cilantro, and parsley are perfect for beginners and germinate quickly.
Consider Your Climate: Check the seed packet for optimal planting times and ensure they align with the local growing season in Central Texas. For example, since we have a warmer climate, we can start seeds much sooner than the northern states since our winters are not as harsh.
Pro Tip: Some seeds, such as sweet peas, morning glories, and nasturtiums, benefit from pre-soaking overnight to break dormancy and speed up germination.
Step 2: Prepare the Growing Medium
The growing medium plays a vital role in seedling health. Follow these tips for the best results:

Choose the Right Medium: Use a sterile, lightweight seed-starting mix like Fertilome Seed & Cutting Mix (8 qts for $17.00) or Fox Farm Bush Doctor Coco Loco (12 qt bags for $17.00) to avoid soil-borne diseases. Avoid using garden soil, as it’s too heavy and may contain pathogens that harm seedlings.
Improve Aeration and Drainage: Add perlite or vermiculite to your mix for better airflow and water retention. A well-aerated mix ensures roots grow strong and healthy. Note that some pre-mixed seed-starting mediums already have the perlite mixed in.
Moisture Matters: Before planting, pre-moisten the mix with water until damp but not soggy and actively dripping. This prevents seeds from being displaced and provides an even moisture level for germination.
Tip for Beginners: Avoid fertilizers in the initial growing medium. Seeds have all the nutrients they need to germinate; fertilizer can cause “burn” and inhibit growth at this stage.
Step 3: Sowing Seeds
Proper seed sowing sets the stage for successful germination. Here's how to do it like a pro:

Follow Depth Guidelines: The front or back of the seed packet will specify the ideal depth for planting. A general rule of thumb is to plant seeds at a depth of 2–3 times their size. Fine seeds, like basil or poppies, should be lightly pressed into the soil’s surface and misted to settle them. Large seeds, like pumpkins, can be planted up to 2 inches deep.
Spacing for Success: Avoid overcrowding. If sowing in a tray, leave enough room (1-2") between seeds to prevent competition and allow roots to grow freely.
Label for Clarity: Use plant markers, labels, or even popsicle sticks to record seed variety and planting dates. This avoids confusion later, especially if multiple trays or containers are used, and everything grows at different times.
Use Quality Containers: Opt for seed trays, peat pots, or Jiffy pellets. Our Jiffy Pots (3" Round) are biodegradable and reduce the risk of transplant shock ($18.00 for a pack). Ensure containers have drainage holes to prevent waterlogging.
Maximize Germination: Lightly tamp down the soil after sowing to ensure good seed-to-soil contact.
Step 4: Create the Ideal Environment
Seeds are highly sensitive to their environment during germination. Provide the following conditions:
Temperature: Most seeds germinate best between 65–75°F. Use a seedling heat mat to maintain consistent warmth for heat-loving plants like peppers.
Light: Provide 12–16 hours of bright light daily. Grow lights, like LED or fluorescent fixtures, are better than relying on a window, especially during short winter days. Position lights 2–3 inches above seedlings and adjust as they grow. If you use a window, ensure it is south-facing and reliably bright throughout the day.
Humidity: To maintain high humidity, cover seed trays with clear plastic domes or use plastic wrap. Remove the cover once seedlings emerge to prevent mold or rot.
Air Circulation: Ensure good airflow to prevent damping-off disease. A small fan can promote air movement and strengthen stems.
Step 5: Water and Monitor
Watering is critical but can be tricky. Follow these guidelines:
Consistent Moisture: Keep the soil consistently damp but never soggy. Overwatering can lead to root rot or mold, while underwatering will cause seeds to dry out and fail.
Bottom Watering: Set trays in a shallow container of water and let the soil absorb moisture from the bottom up. This method helps prevent displacing seeds and keeps the top layer of soil drier to reduce the risk of fungal growth and fungus gnats.
Watering Tools: If you want to water from the top, use a spray bottle or a gentle watering can to avoid damaging delicate seedlings.
Monitor Daily: Check soil moisture and inspect for signs of pests or diseases. Catching issues early can save your seedlings.
By carefully selecting seeds, preparing the growing medium, sowing properly, and creating the right conditions, your indoor seed-starting project will be off to a strong start.
Caring for Seedlings
Thinning: Prioritizing Strong Seedlings

Thinning seedlings is an essential step to ensure that the healthiest plants get the resources they need to thrive. Overcrowding leads to competition for light, nutrients, and water, which can weaken all seedlings in the container.
When to Thin: Begin thinning once seedlings have developed their first set of true leaves (the second set of leaves that appear after the cotyledons).
How to Thin: Instead of pulling out weaker seedlings (which could disturb the roots of neighboring plants), snip them at the soil line with small scissors or pruning shears. They will stop growing immediately.
Spacing Guidelines: Refer to your seed packet for proper spacing recommendations when you are thinning your seedlings. For small plants like lettuce, keep 1–2 inches between seedlings. For larger plants like tomatoes or squash, allow 4–6 inches while they are growing.
Feeding: Nurturing Seedling Growth
Once seedlings have their true leaves, they begin to outgrow the nutrients stored in the seed. This is the perfect time to introduce a gentle fertilizer to encourage healthy growth.

Choosing the Right Fertilizer:
Use diluted liquid fertilizers specifically formulated for seedlings. Options like liquid seaweed or SuperThrive are excellent choices for promoting root and leaf development.
Application Tips:
Dilute fertilizer to half or quarter strength to avoid burning tender roots. A common ratio is 1 teaspoon of fertilizer per gallon of water.
Feed seedlings once every 1–2 weeks. Observe their growth and adjust frequency if leaves show signs of nutrient deficiency (yellowing or stunted growth).
Method of Application:
Water at the base of the plants OR bottom water to prevent moisture from sitting on leaves, which can invite fungal issues.
For smaller trays, use a spray bottle or a small watering can for precise application.
Pro Tip: Alternate feedings with plain water to prevent salt buildup in the soil.
Preventing Issues: Early Intervention for Common Problems
Seedlings are particularly vulnerable to pests and diseases. Here’s how to identify and address the most common issues:
1. Pests:

Aphids: These tiny, sap-sucking insects can weaken seedlings by draining essential nutrients.
Prevention: Introduce airflow to your seedling setup with a small fan, as aphids thrive in stagnant air.
Solution: Spray affected plants with an insecticidal soap or use organic options like Bee Safe 3-in-1 Garden Spray ($26.00).
Fungus Gnats: These pesky insects are often a sign of overly wet soil. Their larvae feed on seedling roots, which can stunt growth.
Prevention: Allow the soil's top layer to dry slightly between waterings, and always bottom-water to reduce damp conditions.
Solution: Use Mosquito Bits ($10.99) to control fungus gnats. Sprinkle the bits on the soil surface where gnats lay eggs, or soak them in water to create a drench for targeted treatment. This does not harm the plant.
2. Mold and Damping-Off Disease:
Mold: White, fuzzy growth on the soil surface is typically harmless but indicates excessive moisture or poor airflow.
Prevention: Avoid overwatering and ensure trays have proper drainage. Use a small fan to increase airflow around your seedlings.
Solution: Dust the soil lightly with cinnamon, a natural antifungal agent. You can also repot seedlings if mold becomes severe.
Damping-Off Disease: This fungal disease causes seedlings to wilt and collapse, often due to soggy conditions.
Prevention: Sterilize seed trays before use, use fresh sterile seed-starting mix, and avoid waterlogging.
Solution: Act quickly if damping-off occurs. Remove and discard infected seedlings to prevent the spread of the fungus.
3. Yellowing Leaves (Nutrient Deficiency):
Cause: Lack of nitrogen or other essential nutrients can cause the lower leaves of seedlings to yellow.
Solution: Feed with a diluted liquid fertilizer that is higher in nitrogen.
4. Leggy Seedlings:

Cause: Insufficient light or high temperatures cause seedlings to stretch, resulting in weak, spindly stems.
Solution: Lower the grow light to 2–3 inches above the seedlings or add supplemental light. Rotate trays daily if they’re near a window to encourage even growth.
Additional Preventative Care Tips
Soil Sterilization: If reusing seed trays, sterilize them with a 10% bleach solution to kill any pathogens.
Sanitation: Always use clean tools and avoid touching seedlings with dirty hands, as bacteria and fungi can easily spread.
Observation: Check your seedlings daily for early signs of stress, pests, or disease. The sooner you catch a problem, the easier it is to solve.
Succession Planting
Succession planting is a gardening technique where crops are planted at staggered intervals to ensure a steady supply of fresh produce throughout the growing season. Instead of harvesting all at once, succession planting allows you to enjoy continuous yields, reduces waste, and makes better use of garden space.
Key Benefits of Succession Planting:

Maximized Harvests: By replanting in intervals, you can make full use of your garden space, especially after an early crop has been harvested.
Extended Growing Season: Succession planting takes advantage of your region's full growing season, providing fresh produce from spring through fall.
Variety: Rotating plantings allows you to experiment with different varieties and ensures a balanced diet of vegetables.
The Hardening Off Process

Hardening off is the process of gradually acclimating indoor-grown seedlings to outdoor conditions. Seedlings started indoors are accustomed to controlled environments, so sudden exposure to direct sunlight, wind, and fluctuating temperatures can shock or even kill them.
Why Hardening Off is Important:
Reduces Stress: Seedlings grown indoors are tender and need time to adjust to harsher outdoor conditions.
Prevents Sunburn: Seedlings that are not used to direct sunlight can easily scorch under the sun’s rays if put out too quickly.
Encourages Root Development: Gradual exposure promotes stronger roots and prepares the plant for successful growth after transplanting.

How to Harden Off Seedlings:
Start Small: Begin by placing seedlings outdoors in a sheltered, shaded area for 1–2 hours on the first day.
Gradually Increase Exposure: Each day, increase their time outside by 1–2 hours and gradually expose them to more sunlight. After 7–10 days, they should be ready to stay outdoors full-time.
Protect from Extreme Conditions: Avoid exposing seedlings to strong winds, heavy rain, or extreme heat during the hardening off process.
Monitor Moisture: Seedlings can dry out quickly outdoors because it is hotter and has more airflow. Check the soil regularly and water as needed.
Check the Forecast: Avoid hardening off during unseasonably cold or windy weather. Frost-sensitive plants should only be transitioned once nighttime temperatures are consistently above 50°F.
Signs of a Successfully Hardened Seedling:
Sturdier stems and leaves.
Healthy green color without yellowing, wilting, or scorching.
Active growth/new leaves, indicating the plant has adjusted to its environment.
Common Mistakes and Troubleshooting
By avoiding these common mistakes and using the troubleshooting tips, you can give your seedlings the best chance to grow into strong, healthy plants.

Mistakes to Avoid
Overwatering or Using Poor Drainage Containers: Overwatering is the most common issue with seed starting. Without proper drainage, water can pool in containers, leading to root rot and fungal diseases like damping-off. Always use pots or trays with drainage holes and water only when the top layer of soil feels dry to the touch.
Starting Seeds Too Early or Too Late: Timing is critical. Starting seeds too early can result in overgrown seedlings that outgrow their pots before outdoor conditions are favorable. Starting too late may not leave enough time for plants to mature. Check seed packets for recommended planting dates based on your region's frost dates.
Using Garden Soil Instead of Proper Seed-Starting Mix: Garden soil is heavy, compacts easily, and may contain pathogens that harm delicate seedlings. Always use a lightweight, sterile seed-starting mix for optimal aeration and drainage.
Plant Recommendations

Vegetables
Tomatoes: Start indoors 6-8 weeks before the last frost date (around late January to early February in most parts of Texas). Transplant after the danger of frost has passed.
Peppers: Similar to tomatoes, start indoors 6-8 weeks before the last frost date.
Cucumbers: Start indoors 3-4 weeks before the last frost date, or direct sow after the frost danger has passed.
Squash and Zucchini: Start indoors 3-4 weeks before the last frost date or direct sow after.
Lettuce: Start indoors 4-6 weeks before the last frost date. Lettuce can tolerate a little frost.
Carrots: Direct sow carrots 2-4 weeks before the last frost date. They do not transplant well.
Herbs

Basil: Start indoors 4-6 weeks before the last frost date. Basil is sensitive to cold.
Cilantro: Best sown directly into the garden a few weeks before the last frost date, as it does not transplant well.
Parsley: Start indoors 8-10 weeks before the last frost date.
Rosemary: Start indoors 8-10 weeks before the last frost date.
Thyme: Start indoors 6-8 weeks before the last frost date.
Native Plants and Flowers
Bluebonnets: For spring bloom, plant seeds in the fall (October to November).
Indian Blanket: Sow seeds in the fall for spring blooming.
Black-Eyed Susan: Plant seeds in the fall or early spring.
Winecup: Plant in early spring.


Comments